SketchUp Basics Tutorial Part 1 – A Tutorial Primer for those new to SketchUp
SketchUp is a 3d-Modeling program currently owned by Google. Originally it was developed by Last Software in 1999 as an easy to use design tool that design professionals could emulate working with pen and paper. It was meant to be accessible for anyone to pick up and design anything in 3-D. Google purchased the software in 2006 and expanded it’s reach to the masses and used as a way to populate Google Earth as well as used in professional design offices around the world. SketchUp still has all the features that have made it one of the easiest 3-D design software and offers many features that allow a designer to complete their projects efficiently and create professional renderings.
In this multi-part tutorial I will show you the basics of SketchUp to get you started on your own design. Whether it’s professional, educational or just for your own fun, we will walk you through the basic tools that you need to create your first model.
Part 1: The user Interface
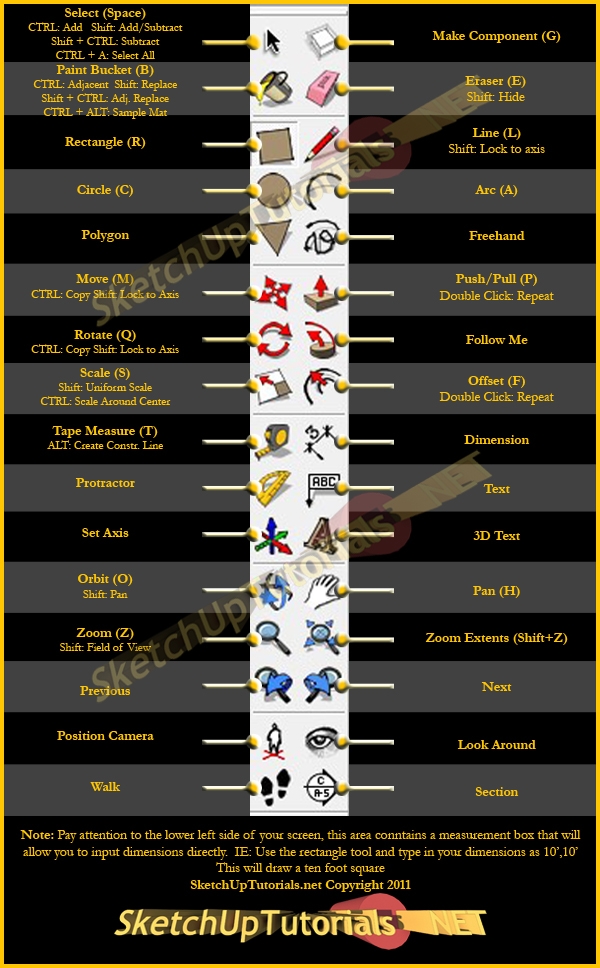
We will begin with the basic “Large Tool Set” toolbar that you must open from view menu.
To Open “Large tool Set” go to View at the top of the screen, then go to Toolbars and click on Large Tool Set. If you still have the “Getting Started” toolbar still open, deselect it from the Toolbars list.
Now lock the “Large tool Set” to a side of the screen, whatever works best for you. Drag it to a side and it will auto lock to that position on the screen.
This is the Large Tool Set, it includes all tools from the “Getting Started” tool set plus many features that you will use as you become more advanced in your modeling abilities.

The most common tools you will use will include all of the Draw commands as well as the Measurement tool and Orbit. Practice with these tools to gain fluency in their use as well as learn how they operate. There is no better teacher than practice, so…. Practice.


